Wednesday, September 28, 2011

* Tips To Use Live Bait Effectively

image from : vagabondjourney.com

7 Tips To Use Live Bait Effectively

Author: Abhishek Agarwal
Several myths exist with regard to the use of live bait instead of artificial ones. Like all myths, a lot of them are baseless. Many anglers still use live baits. However, most anglers admit to the fact that live bait is not only messy, but also stinks. You can happily use live bait during your next fishing expedition if you don't mind the fact that it stinks or creates a mess.


You should remember some basic principles if you want to use live bait. These principles are quite messy and disgusting, but you will have to follow them.


1. Wet Your Hands


Never touch live bait with dry hands. The slimy coat of live bait not only protects the bait but also invites predators. If you touch live bait with dry hands, you will inadvertently remove this protective slimy layer.


2. Use Recently Dead Bait


In case you lack a sufficient quantity of live bait, you could collect some bait that has recently died in the water source where you store your live bait. When you have exhausted your supply of live bait, you can use the recently dead bait to lure fish. You only have to cast in the line and move it slightly to make it look as if your bait is still alive.


3. Don't Use a Heavy Weight


Since fish are smart enough to notice a heavy weight that pulls down a bait, you will have to take care about the weight you put on a fishing line. See that your sinker is light enough to make it look as if it is freely floating on the water.


4. Take Care of Live Bait


You will have to adjust your fishing techniques to suit the season. The toughest challenge of the summer is to keep the bait alive. Live bait is difficult to obtain in the hot days of the summer. In the South, especially, the summer can be very harsh.


You will have to regularly change the water in which you keep your bait so that it gets a fresh supply of oxygen. Simply changing the water, however, is not sufficient to keep the bait alive.


You will also have to maintain the temparature of the water. The water, especially at the top can be too hot, and hot water is very dangerous for live bait. Your bait will live happily if you add some ice to the water in which you keep it.


Remember also to put some water softener salt to the water in which you keep your live bait. The water softener salt serves to harden your baits' scales while at the same time preserving its slimy coat that is chiefly responsible for attracting predators.


5. Anticipate Shortage of Bait


Summer usually creates a shortage of bait such as live croaker or shrimp. You can save a lot of your time if you ensure well in advance if live bait is available at you local fishing store.


Shrimp is commonly available during the summer, but it is not really a very effective bait. All anglers use them and so it fails to excite the fish because they see it all around them. Try using a bait that is not commonly used to enhance your chances of catching fish.


6. Never Hook Bait in the Eye


The most important point you should bear in mind when you use live bait for fishing is never to hook them in the eye. The bait should see the fish that is approaching it and get more excited. These excited movements on the part of the bait will attract the fish to it.


7. Learn to Catch Live Bait


Learn how to cast your net properly when you are making an attempt to catch bait. Sometimes, people cast the net too soft or too hard. This often leads to failure and frustration with the net that refused to open.


Live bait is extremely useful if you want to have a day-long fishing trip at sea. Naturally, fish will be more attracted to real food, not fake food. But using live bait is not convenient for the average angler. It means a lot of work. So ensure that you have mentally prepared yourself to handle all the extra fuss and bother before deciding to use live bait for fishing.
About the Author:
Abhishek is an avid Fishing enthusiast and he has got some great Fishing Secrets up his sleeves! Download his FREE 116 Pages Ebook, "Fishing Mastery!" from his website http://www.Fishing-Masters.com/772/index.htm . Only limited Free Copies available.
Article Source: http://www.articlesbase.com/fishing-articles/7-tips-to-use-live-bait-effectively-776228.html

Monday, September 12, 2011

* Introduction to Saltwater Fly Fishing

image : profishingreels.com

Introduction to Saltwater Fly Fishing
By Phil Genova

Though often heralded as the latest discovery of the "in" fly fishing crowd, saltwater fly fishing has been around for quite some time. Anglers throughout New England have cast to striped bass with a fly rod since the 1800s. In more recent times, salmon anglers used their heavier tackle and gaudy full dressed flies to entice tarpon and other marine species.
The 1950s saw the beginning of modern day saltwater fly rodding with innovative anglers like Joe Brooks and Jimmy Albright successfully catching a variety of gamefish on the flats of the Florida Keys and on Chesapeake Bay or Curritick zyzzyx Sound and publishing articles for Outdoor Life and Field and Stream. Pioneer saltwater flyrodders A. J. McClane, Homer Rhodes, Jr., Lefty Kreh, Bill Catherwood, Stu Apt, Lee Wulff, Billy Pate and many others helped perfect the techniques and design the flies and tackle for this Anew@ version of an ancient sport.
Modern fly fishers pursue nearly all marine gamefish species in all the oceans of the world, from shallow flats fish such as red drum, bonefish and tarpon to the deepwater giants, including marlin and tuna. Rods, reels and lines have been designed specifically to meet the demands of this specialized sport. Today, saltwater fly fishing is the fastest growing segment of the sportfishing industry.
The beginner can be overwhelmed and even put off by the apparent complexity of the sport, expense of the tackle and difficulty of the techniques. To be a successful saltwater fly angler, the most important rule to follow is: keep it simple.
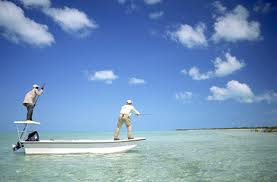
The most accessible and easily mastered type of salty fly rodding takes place on inshore beaches, salt ponds, in rivers that flow into the ocean, from jetties and on wadeable flats near shore. These are the best places to begin a saltwater fly fishing education.
Saltwater Tackle - Purchasing Rod, Reel, Lines
Tackle for saltwater fly fishing can be as elaborate or simple as an angler cares to make it. The explosion of popularity enjoyed by the sport has created a range of suitable tackle that can fit almost any budget. Before purchasing equipment, determine the usual fishing conditions and the species being sought. In the first instance, knowing whether the equipment will be used on sheltered bays, flats, open ocean, tidal rips, or reefs will begin to define equipment needs. Adding in the size, habitat and habits of the fish being sought will refine that definition. These factors will determine the size, type and mass of the flies being used as well as the size and weight rating of the fly rod. Clearly, a rod for inshore fish like spotted seatrout and flounders can be a good deal lighter and have less backbone than one meant for sailfish, marlin, larger tuna or big tarpon.
Heavier freshwater tackle will do well for many saltwater situations, but bigger game fish may require rods with much more power, for casting, striking the fish, and playing heavyweights. Consulting experienced local anglers or tackle shops where fly fishing is featured may prove helpful.
Saltwater rods generally run in the 7-weight to 12-weight class, in lengths from about 82 to 92 or 10 feet. Some specialized situations employ shorter rods, but they are unusual in saltwater. A short fighting butt, either permanent or detachable, is helpful when playing large, powerful fish. Guides should be stainless steel with the wrappings coated with epoxy rod finish for durability. A quality locking reel seat is advisable as well.
A quality, corrosion-proof reel with a line capacity of at least 200 yards of 20 to 30 pound test backing plus the fly line is needed for fish that tend to make long, hard runs. Reels should have a palming rim and a good drag system to aid the angler. One or more extra spools equipped with other lines will be appreciated when it is necessary to change tactics to reach feeding fish. For versatility, the spare spool could be set up to handle a series of shooting heads with a floating or intermediate running line.
Quality weight forward lines in a bug or saltwater taper are the best bet for saltwater anglers. Although some very precise casting may be required, saltwater fly fishers usually are contending with wind, currents, and big water. The ability to bust out a long cast into the wind with a bulky streamer may make the difference between a great day on the water and frustration. Try the rod with several line weights to determine what works best for your conditions and casting style. Sometimes over-lining the rod by one or two line weights will produce a rod that beats the wind better and drives big flies harder. Sometimes doing so will simply overwhelm the rod and reduce casting efficiency. Many saltwater anglers are fishing a weight or two on the heavy side.
Floating lines will handle the bulk of the salt water situations where fish are near the surface or in shallow water. Some anglers prefer an intermediate line, one that is neutral density and sinks slowly, for most of their fishing. Some conditions call for getting the fly deeper, even in heavy current. Sink tip, sinking head or full sinking lines in a variety of densities can be useful under those conditions. Taking a page from the western steelheaders= books, many saltwater anglers have gone to shooting heads with a floating or intermediate running line to permit quick changes among line densities and types for the fishing conditions. This can have the angler prepared for many circumstances without needed a second mortgage on the house.
Leaders
Leaders in salty fly rodding tend to be shorter and heavier than in freshwater angling. The shorter leader helps to turn the larger flies over and the heavier tippet will be more abrasion resistant. Saltwater fish tend to be less leader shy and live in rougher terrain than their sweetwater counterparts, eliminating the necessity of fishing with fine leaders in most circumstances. Where finer leaders are required, they are easily prepared by knowledgeable anglers with a good leader tie kit. (See Monofilament Leaders for Fly Fishing).
A simple 6-9 foot leader can be made by tying 30 to 40 pound test leader to 20-25 pound leader and attaching 2-3 feet of 10 to 15 pound leader as a tippet. (See note above). Specialized leaders for special situations may need to be constructed, but keeping things simple helps.
Where sharp teeth or opercula are encountered, shock tippets or bite tippets are advised. Heavy monofilament can be tied to the tippet with an Albright knot, and the fly can be attached with a Kreh loop knot for better action. If monofilament in the 30 to 80 pound class is inadequate, woven or single strand wire can be attached with either an Albright and a haywire twist or by forming a loop and attaching the leader with a Palomar or similar knot. Keep any wire as short as possible (4@ is usually enough), and as thin as possible for the job you intend it to serve. Heavier wire is more obvious, causes more challenges in the casting department, but will not kink as readily as the thinner material. Where fish like bluefish are encountered, dark leader material is better than bright stainless steel wire because the fish will not bite you off as often trying to take the Aprey@ away from their fellow school-mates. Note that the International Game Fish Association (IGFA) rules require that the Abite or shock tippet must not exceed 12@ (including knots) and the class tippet be a minimum of 15 inches in length@ for any fish to be considered for record purposes
Knots
Knots are the weakest link in a saltwater fly fisher=s equipment. Good, strong knots tied well and snugged down fully are the best defense against lost fish due to equipment failure. (See Knots for Anglers). Practice increases the ease and speed of tying knots under fishing conditions. The following list includes a few knots and their applications to saltwater fly fishing.
Albright - tippet to mono bite tippet, tippet to wire bite tippet, backing to fly line
Arbor Knot - attach backing to reel arbor
Blood Knot (also Barrel Knot) - monofilament to monofilament where diameters are similar
Haywire Twist - wire bit tippet closure
Improved Clinch - standard knot for tying the tippet to the fly (Palomar knot is better and more compact)
Kreh Loop Knot - attaching shock tippet to fly where movement is desired
Nail Knot - leader butt to line
Perfection Loop, Surgeon=s Loop - loop knots for leaders and line tips
Three Turn or Rhodes - attaching heavy monofilament shock tippet where fly movement is not critical
Loop to Loop Connection System
This is an effective method for quickly connecting two lines of similar or dissimilar diameters. It is fast, strong and efficient, providing quick change options to the angler without the need to tie additional knots. Loops are simply interlocked by passing one loop through the other, then passing the tag end of that line or leader through its own loop. The resulting knot resembles a square knot with the two loops pulled flatly together. Some examples of uses for the system include:
1. Attaching a leader butt section to the fly line
2. Attaching a tippet section to a leader butt
3. Attaching the tag end of a fly line to backing
4. Attaching a shooting head to running line
5. Attaching a weighted leader section to a line or leader
6. Changing multi-tip line tips

Shooting Basket
Along with a well-maintained rod, reel and line, the successful salty fly rodder needs one more essential piece of equipment. A shooting basket helps to keep the fly line from becoming tangled around any available object like feet, boat cleats, net handles and weeds. It also keeps the line out of the water, reducing drag and permitting anglers to make longer, more accurate casts while wading flats, standing in surf or standing in a boat. Several commercial models are available in both soft bodied and hard bodied forms. A simple but very effective homemade shooting basket designed by saltwater fly fishers in New England is in use all over the world. It can be constructed from a plastic dishpan about 6 to 7 inches deep and a shock cord or wader belt.
Construction is simple. Start by drilling several holes in the bottom of the pan for drainage. If the pan has dimples in its bottom, those depressions make excellent sites for the holes. For use with a shock cord, drill two holes in the upper corners of a long side of the dishpan and insert the shock cord hooks into the holes. For use with a belt, make two slits wide enough for the belt on the ends of one long side, and slide the belt through the slots. This simple device will make a trip to the ocean a lot more fun and probably more productive.
Tackle Care
In no other area of fly fishing is tackle care more important than in salty or brackish water. Saltwater and sand quickly corrode and destroy even the most expensive equipment if it is not properly cared for. Fly tackle will be pushed to its limit by the powerful saltwater fish, and abused by contact with coral, rocks, shells, sand, brine, sunlight and a host of enemies conspiring to turn fly gear into junk.
Before the Trip -Prior to the trip run through a checklist and inspect the tackle.
• Check lines for strength and any damage or abrasion
• Check leaders and tippets for nicks or abrasions
• Check all knots and retie as needed
• Stretch lines and coat with line cleaner or Armorall7 auto wax and wipe with a clean cloth
• Check rod guides for nicks, scratches or hairline breaks
• Check reel seats for good order
• Inspect and oil (or use silicone lube) on all moving parts of reels
• Inspect hooks and sharpen as needed

After the Trip
• Immediately wash and rinse all tackle (use a soapy cloth and rinse throughly with light pressure (caution: heavy pressure forces salt deeper into the line and moving parts of reels and reel seats)
• Wipe down with a clean cloth and air dry
• Break down reel and rod and clean them thoroughly
• Run out lines, rinse backing, run lines through line cleaner/Armorall7 wipe down with a cloth
• Spray a moisture replacer lightly on all metal parts (NOT on the line) and wipe down
• Loosen reel drags all the way and store (see Rod and Reel Socks fact sheet)
• Wash and dry flies that were exposed to saltwater or spray before storage

Following these simple steps will make your experiences as a saltwater fly-rodder much more pleasant and successful. It will also reduce your costs in tackle replacement.
The use of this trademarked name reflects the experience and preference of the author. It does not imply endorsement by the Extension Service or censure of any product not mentioned. When trying a new product, test a small portion of the line to make sure that the product is compatible with the finish on the line. Commercial line dressings are designed for this purpose.

Adopted From National 4-H Sport Fishing Programs
Download Article Introduction to Saltwater Fly Fishing

Monday, September 5, 2011

* Top 10 Crappie Tube Jigs

image from saltyweeks.com

Top 10 Crappie Tube Jigs

Author: Daniel Eggertsen

As is the case with most fishing products, stating what is and what is not the "top" anything really opens up a can of worms that you can NOT fish with! The best bet for guiding you in a positive direction as far as using tube jigs for catching crappie, is to tell you why they work, what to look for in a crappie tube jig, and give you some examples of the types of crappie tube jigs many anglers find effective, productive and easy to use.


The following is a short list of several popular and effective crappie tube jigs you can take a look at if you are in the market for tube jigs to take with you the next time you are going out to catch some crappie.


Mizmo 1.5" Tracers

Mizmo 1.5" Specs : The most popular Crappie Tube on the Market!

Mizmo1.75" Earthtones

Mizmo 1.5" Dusters

Mizmo 2.5" Crappie teasers

Cabela's Rigged Minnow Tubes (1/8th ounce jig head that has the 1/0 hook.)

Midsouth tubes Crappie Wall Hanger II

Mizmo's 1/32oz crappie jighead

Southern Pro Lit'l Hustler tubes

Southern Pro Crappie tube


The crappie is probably America's favorite panfish, and the bottom line is that the crappie tube jig has really made a huge difference when it comes to catching them. In fact, the crappie tube jig has taken over the #1 spot as the most popular bait for catching crappie, edging out the minnow for that honor.


This popularity is due to several factors. Perhaps the most prevalent reason is that it is just plain, old easier to use than live bait of any kind. These tubes are not messy or slippery. They don't tend to get away from you, they don't die on you, and they really do last a long time.


You can buy them when it is convenient, and store them until you need them. Once you put a crappie tube jig on your line, you can easily catch upwards of twenty fish with it before you have to put on a new one. If you manage to get one hung up on you, it can be retrieved out of the offending brush without much fuss. They just tend to stay on your line when you put them there, which makes for much more easy, fuss free fishing, and that is something we all look forward to. Still, all in all, the biggest single reason for the popularity of the crappie tube jig is that they catch fish. Simple. To the point. Crappie tube jigs just catch more crappie.


Add to that, the fact that they are so versatile that they can easily be adapted to the variables one encounters when fishing for crappie. You can easily change your jig to match the weather conditions, color of the water, depth changes you might make to better catch crappie, or any other variable you might run across when you are fishing. This versatility makes the crappie tube jig popular with beginners and expert anglers alike.

About the Author:

Dan Eggertsen is a fishing researcher and enthusiast who is committed to providing the best crappie fishing information possible. Get more information on crappie fishing here: http://www.askcrappiefishing.com/

Article Source: http://www.articlesbase.com/sports-and-fitness-articles/top-10-crappie-tube-jigs-558295.html

Saturday, September 3, 2011

* How to use a very effective tuna fishing technique to catch more snapper

image from : amazingdata.com

It must have been about ten or so years ago. We were chasing some fresh bait. The shallow bay in the Bay of Islands was just about perfect for netting some piper (garfish). At high tide the bay was little more than chest deep at the deep end of the drag net, and the bottom covered in eelgrass.
So we quietly set ourselves up – me on the shallow end – of course - and Ed the lad on the deep end – as it should be. Ed waded first waded straight out, then across the bay, pulling the net into a line across the beach, then letting out rope as he waded returned to shore. We then started to haul in the net.
As the net neared shore we knew we had scored. The belly of the net rippled with fish. By the time we pulled the net onto the beach we knew we had scored to well. We had scooped up a huge school of sprats, hundreds of them. Far to many for us to keep at our freezer-less campsite. Far too many to even give away. We threw as many back as we could, but as sprats seem to do – many died, apparently from shock. We ended up with four or five big buckets of bait.
But all was not lost, nor wasted. The next day, Ed the lad and I were to join a couple of friends of ours, on their boat, for a spot of snapper fishing. I had been doing some reading on tuna ‘cubing’ or ‘chunking’ (depending on whether the magazine was American or Australian) and a germ of an idea had formed. The time for the idea to germinate had arrived.
We reached the rock about mid-morning and anchored up current. Ed and I then set about cutting a big heap of sprats into chunks, about three chunks per sprat. Then we started to feed these chunks over the side, two or so at a time. As these chunks disappeared into the depths, another two followed.
Meantime we all rigged up with tiny ball-sinkers straight onto the hook, pinned a chunk of sprat on the hook and slowly let the baits drift back behind the boat.
“Fish biting just about every bait that drifted back”
For the first half-hour, maybe more, very little happened, and there began some low grumbling amongst the crew. Towards the end of that time the grumbling began to turn into mutinous rumbling, and ‘chunking’ was being consigned to another one of my harebrained schemes. But as if on cue a couple of snapper decided to bite a bait or two, and soon it was all on – really on. Fish biting just about every bait that drifted back.
The only break in the action coming when we realised we had forgotten, in the excitement, to keep the chunking trail going. But soon after the trail was started again, the fish began to bite. A truly memorable day.
The idea did not die.
Sometime later I miscalculated the defrosting time of a ten kilo block of pilchards. I was left with something approaching ten kilos of mush. Putting the mess back in the freezer solidified the problem till the next fishing trip. We picked up some good quality pilchards, and with the mushy pillies in the bottom of a fish bin we headed to the latest spot ‘x’. Anchored up, Ed and I set up a chunk trail using the spoiled bait. Down this trail we drifted chunks of our firmer pilchards. Soon snapper in numbers and good quality began to hit our baits.
Another time saw the dregs and dross from the bottom of the bait freezer come into play. It had to happen. Some of the fish down in the deep dark depths of that freezer had last seen the light of day too many years ago. It was not one of the more pleasant jobs to come my way.
But for every yin there is a yang. I now owned a solid base of fillets from kahawai, trevally, and such to set up the cubing trail from Hades. While the fillets were still malleable I cut the fillets into cubes about 2 or 3 cm square, and re-froze them in bags.
So all was ready, and the next time Ed and I headed out in the tiny tinny the cubes came with us, and out they went, in an unending stream. Down the trail we drifted cubes of skipjack tuna loaded with a hook. We had great sport.
The technique works – and well it should – it seems to have three key factors leading to success.


• First the of chunks or cubes sets up both a visual and odour trail that is attractive to fish.

• Second the trail is dispensed slowly enough that it may well set up ‘competition’ between fish to get at the chunks as they drift down – this may make it easier to tempt them with a hook laden bait.

• Thirdly, the hooked chunks are drifting down at about the same rate as the unhooked chunks – the hooked baits look as ‘natural’ as the unhooked baits.
There are a couple of factors that need to be taken into account when using this technique.


It is bait intensive – you need heaps of bait to set up a good trail, and you need to maintain it throughout the fishing session.
The cubes or chunks should not be fed out too quickly. Judgement needs to be used here, but a chunk or two every thirty to forty seconds is often about right. But this is relative to fishing depth and current flows.

The hooked baits need to be weighted, (or not weighted), so that they sink at much the same rate as the free sinking chunks. Resist the temptation to add more weight to get a bait back down to the fish quicker. In my experience this usually just means the bait falls below the trail and away from the fish. If fish are directly below the boat in no-current situations this is less of a problem.

The best technique for feeding out line is to have the reel in free-spool - with the thumb lightly on the spool shoulder - pull off line at a rate that allows to bait to free-fall but not to the point where there is too much slack wafting about in the water. For this reason I find it better to use a free-spool reel rather than a spinning reel. It is just so much easier to control the drift, and get the reel into gear when a fish strikes.
I find that using recurve (sometimes called ‘longline’ or JAP) hooks work best for this type of fishing. Because there is - or should be - little or no tension on the line as the bait drifts back, it can be very difficult to detect bites. Recurve hooks are self-setting, relying on the fish biting on them to push the point into flesh, so they are ideal for this job.
The breaking strain of the line you use is important too. Too heavy a line - read too thick - and the baited chunk or cube will not sink at the same rate as the unhooked chunks. This is more especially true if the trail is drifting down in a current. It also needs to be remembered that the cube or chunk used as a hooked bait should be around the same size as the chunks used in the trail. So too heavy a line will exaggerate drift problems as there may not be enough weight in the bait to pull the heavy line down.
Just a quick observation about bait size. In general I have found that the hooked bait should be around the same size as the chunks or cubes used for the trail – and it seems to make little difference to the size of fish caught. I catch small fish and bigger fish in around the usual ratio. But I also as a matter of course fire out a really big bait, a skipjack head or large fillet, or four or five pillies hung off a 8/0 hook, way back down the trail. This has picked up some very big fish.
As far as using a berley (ground bait) trail when cubing goes, I have found it better not to. It is only a theory of mine but I think that because a berley trail sinks at a different rate to the chunks you can end up with two distinct trails. This is counter productive. Besides a berley trail to often ends up attracting hoards of small bait fish which eat the cubes before they have a chance to reach snapper holding below.

Source And Adopted From

www.bishfish.co.nz/